Wenn Du eine coole Community suchst, die super Anfänger-freundlich ist, dann bist Du auf unserem Discord richtig. Klick einfach auf den Discord-Button unten und spiel sofort mit!
BombRats DiscordIn jeder Karte müsst Ihr den Ausgang finden, ohne Karte ist das… etwas schwierig. Hier daher die besten Karten. Je nachdem wo Ihr spawnt und abhängig davon, ob Ihr PMC oder SCAV seid, liegen Eure Exits an anderer Stelle, außerdem sind einige Exits nur zu bestimmten Zeiten offen. Mehr bei den jeweiligen Karten.
Karte zu „Reserve“
Alle infos gibt es hier:
Karte zu „The Lab“
Alle Infos, Karten und vor allem Tipps, wie Ihr dort überlebt (die AI Gegner sind erheblich schwieriger als normal) findet Ihr hier:
Interchange
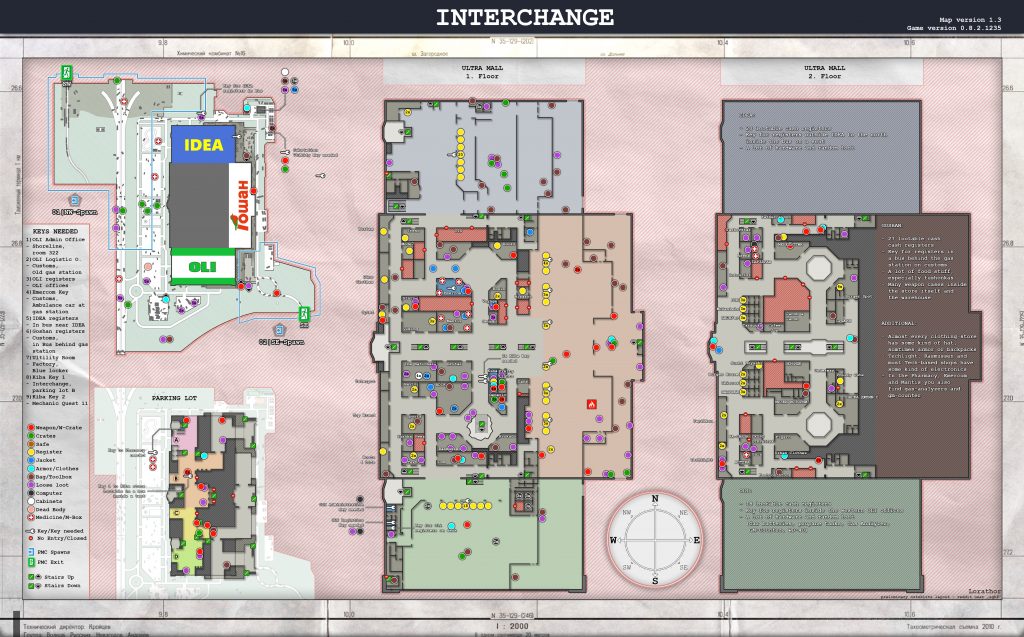
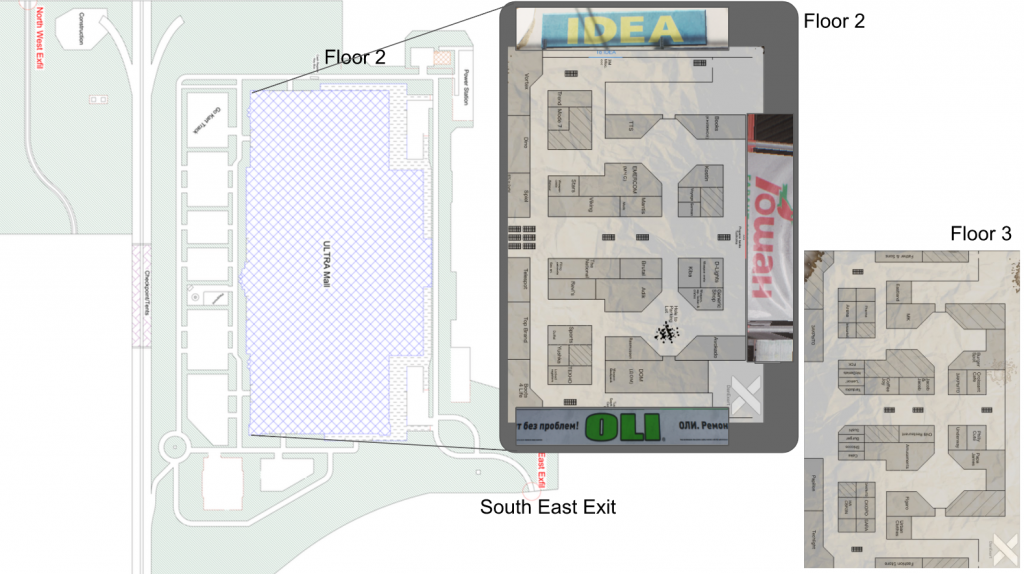
Quelle: https://www.reddit.com/r/EscapefromTarkov/comments/8gixyg/interchange_map_incl_loot_and_keys
Detail-Maps: DanExert https://forum.escapefromtarkov.com/topic/68227-made-maps-for-interchange-mall
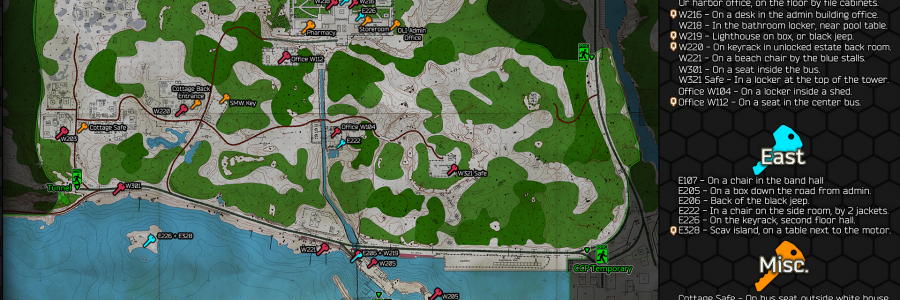
Customs
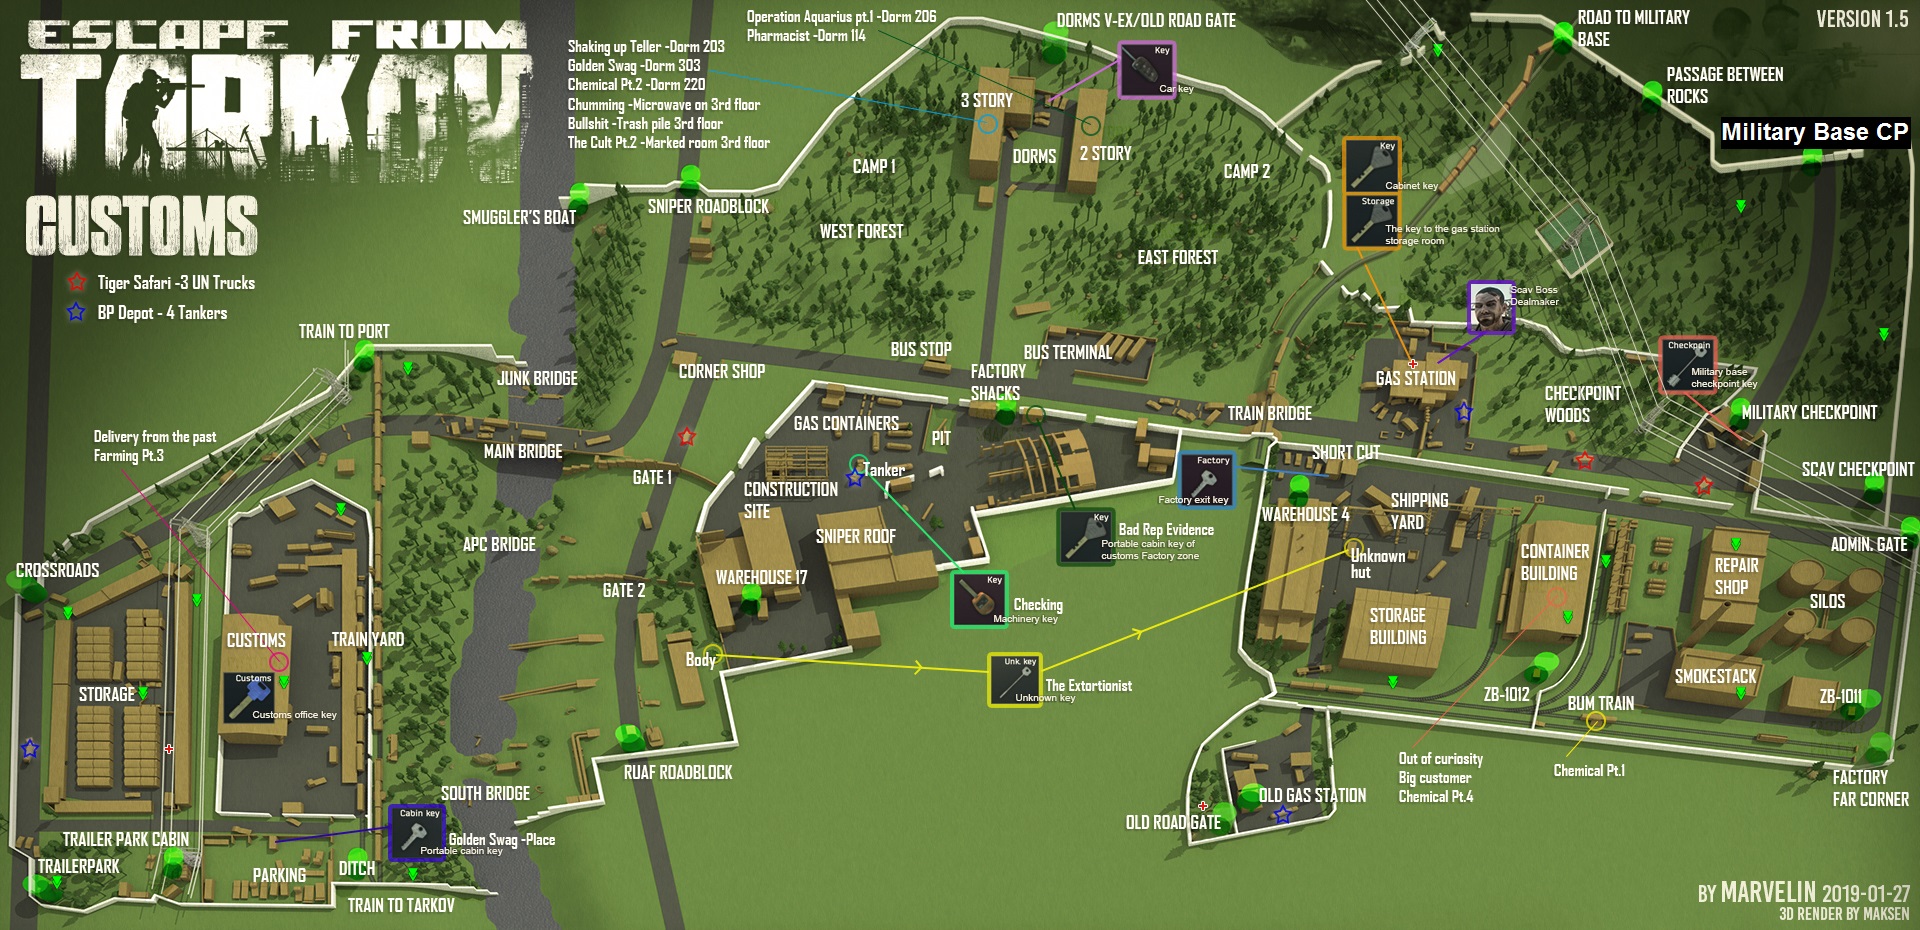
Quelle: https://forum.escapefromtarkov.com/topic/63762-customs-complete-map-with-loot-keys-and-buildings/
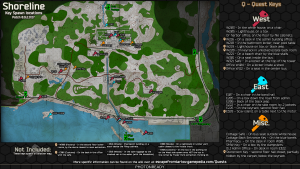
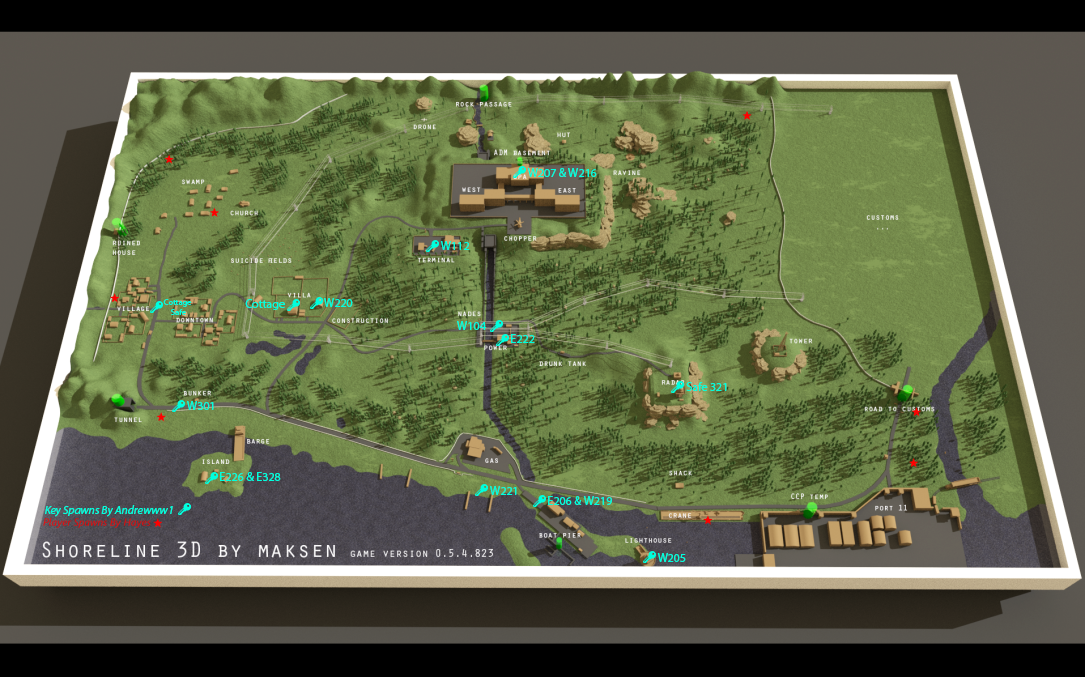
Shoreline
Quelle: https://www.reddit.com/user/maksen
Woods
Die neue Woods-Map incl. Erweiterung (Dörfer, 2. und 3. „Marked-Circle“ etc.
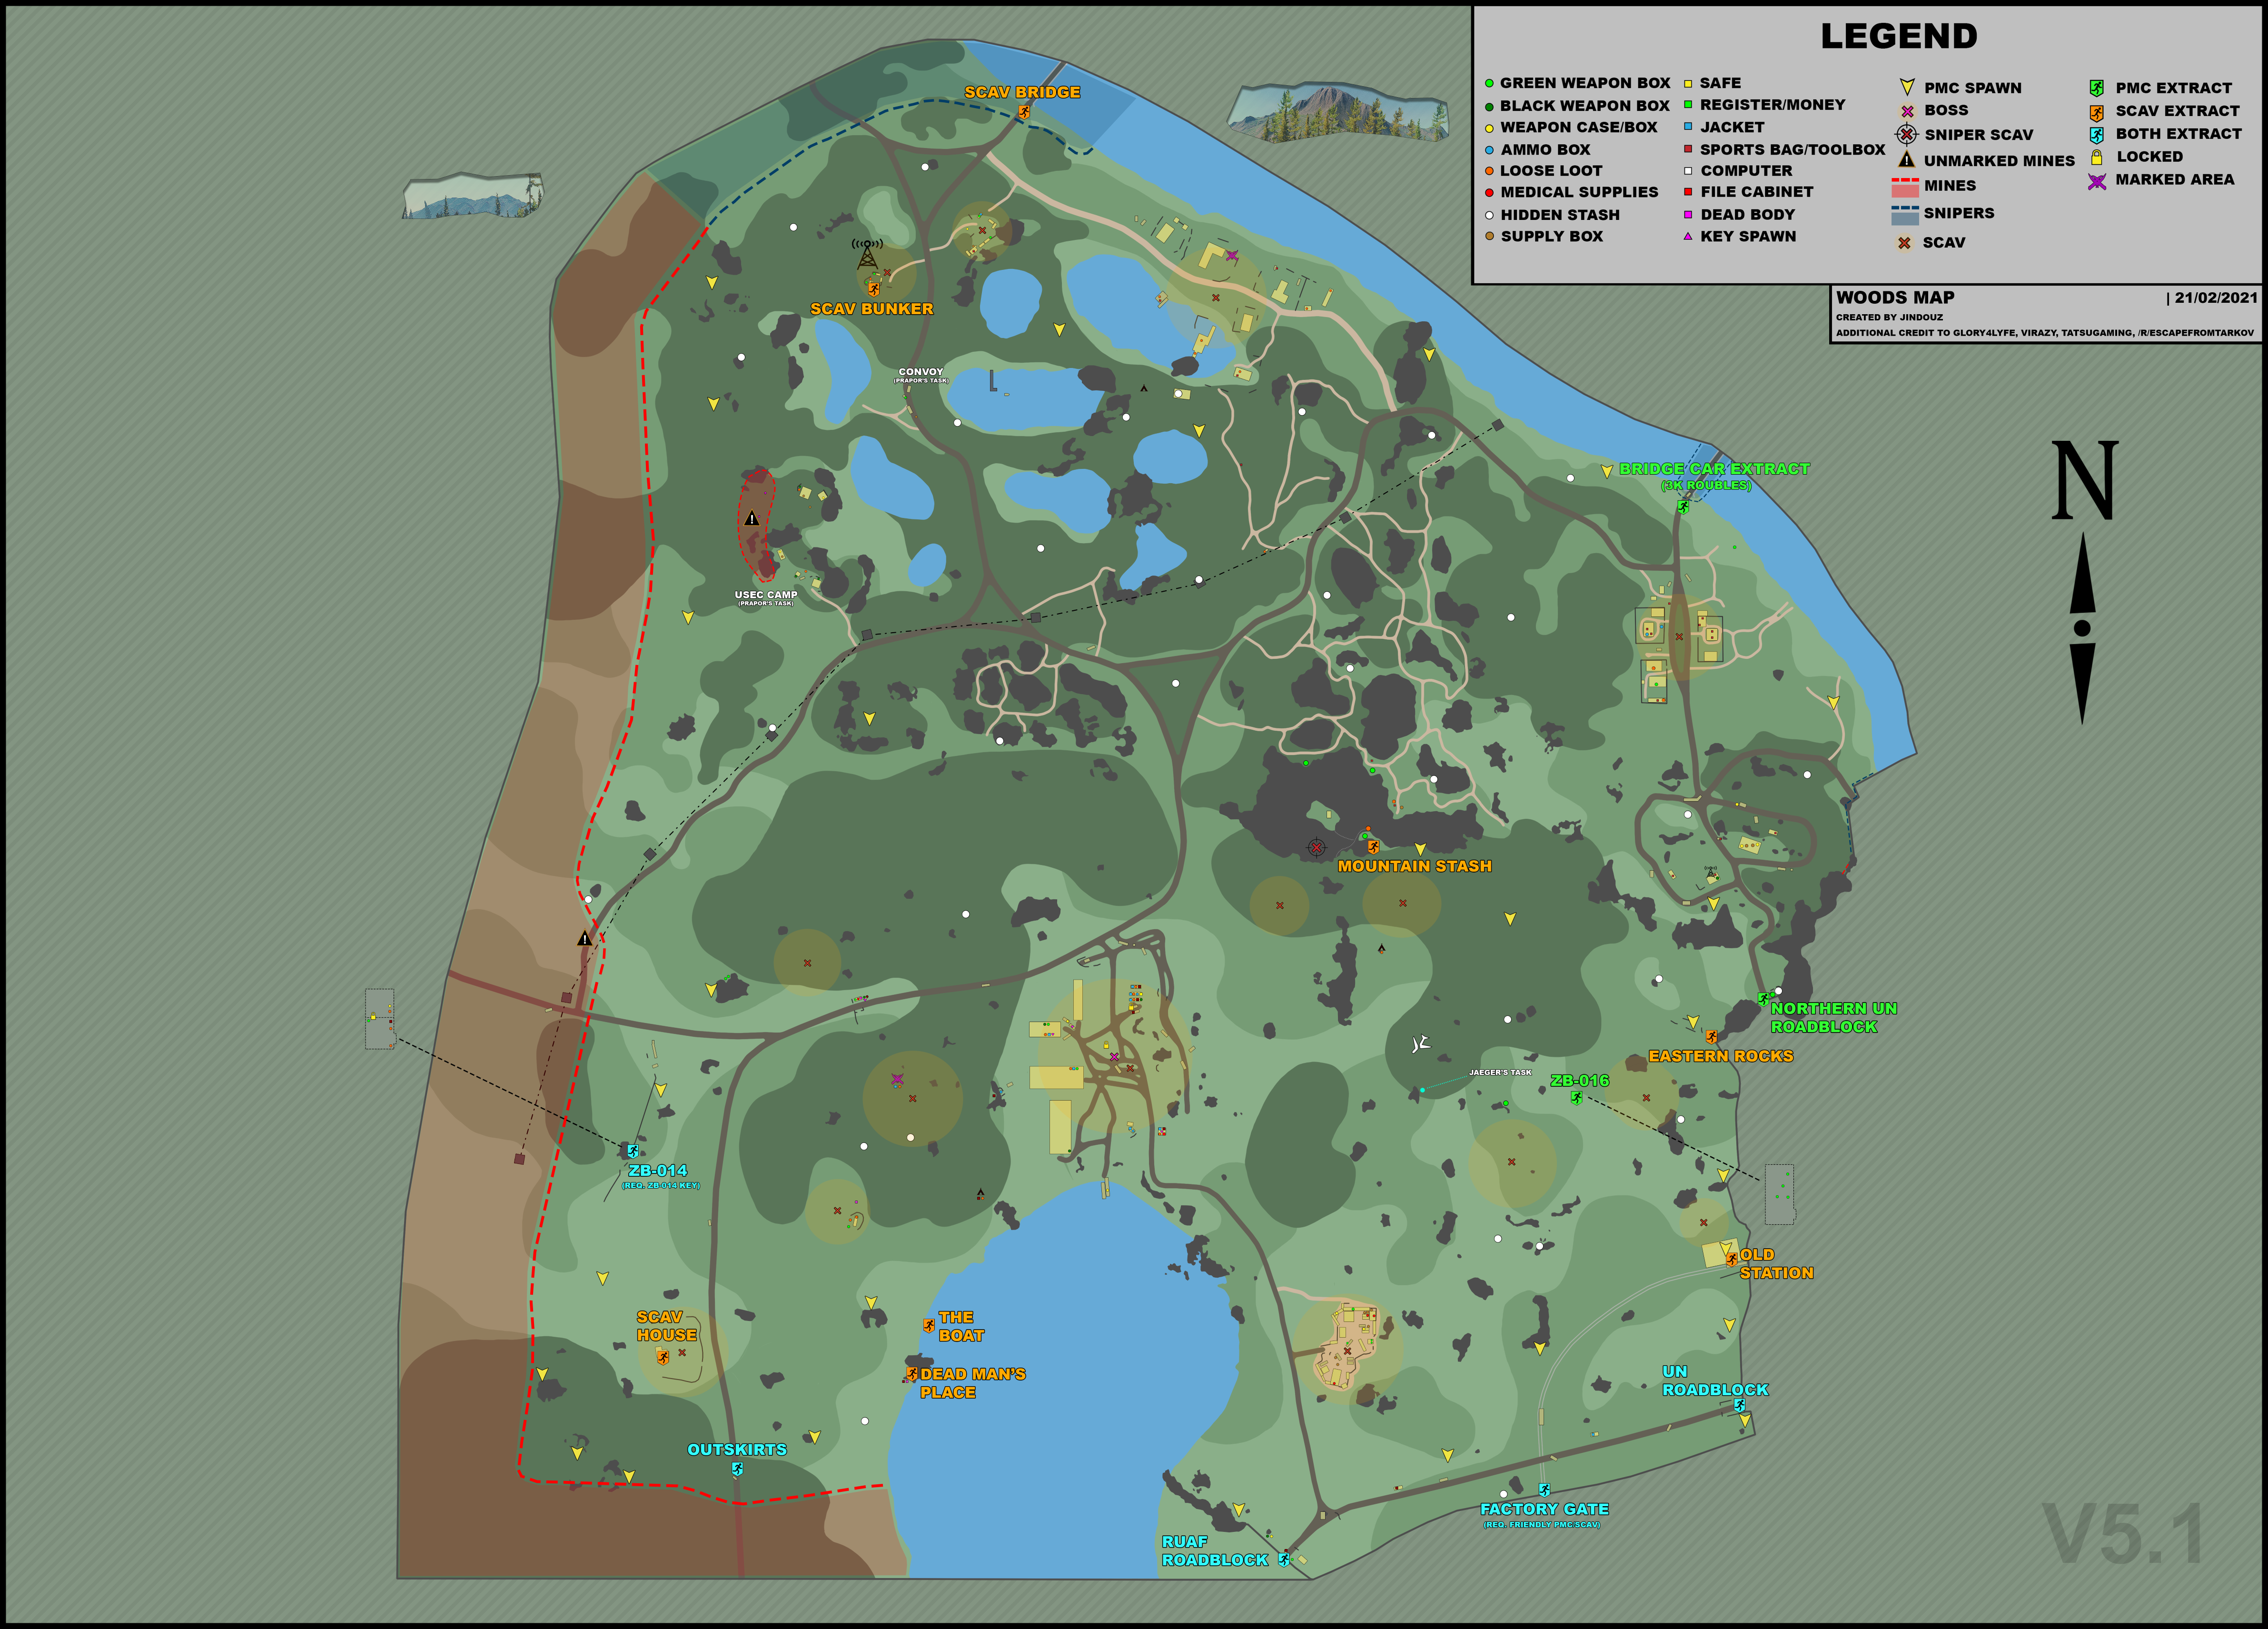
Quelle zu dieser Map: https://escapefromtarkov.fandom.com/wiki/Woods
Andere Quellen:
- https://forums.uwsgaming.com/topic/5438-shoreline-map-comprehensive-guide/
- http://eftmkg.com/woods-full-SpeedPriest.html
Factory
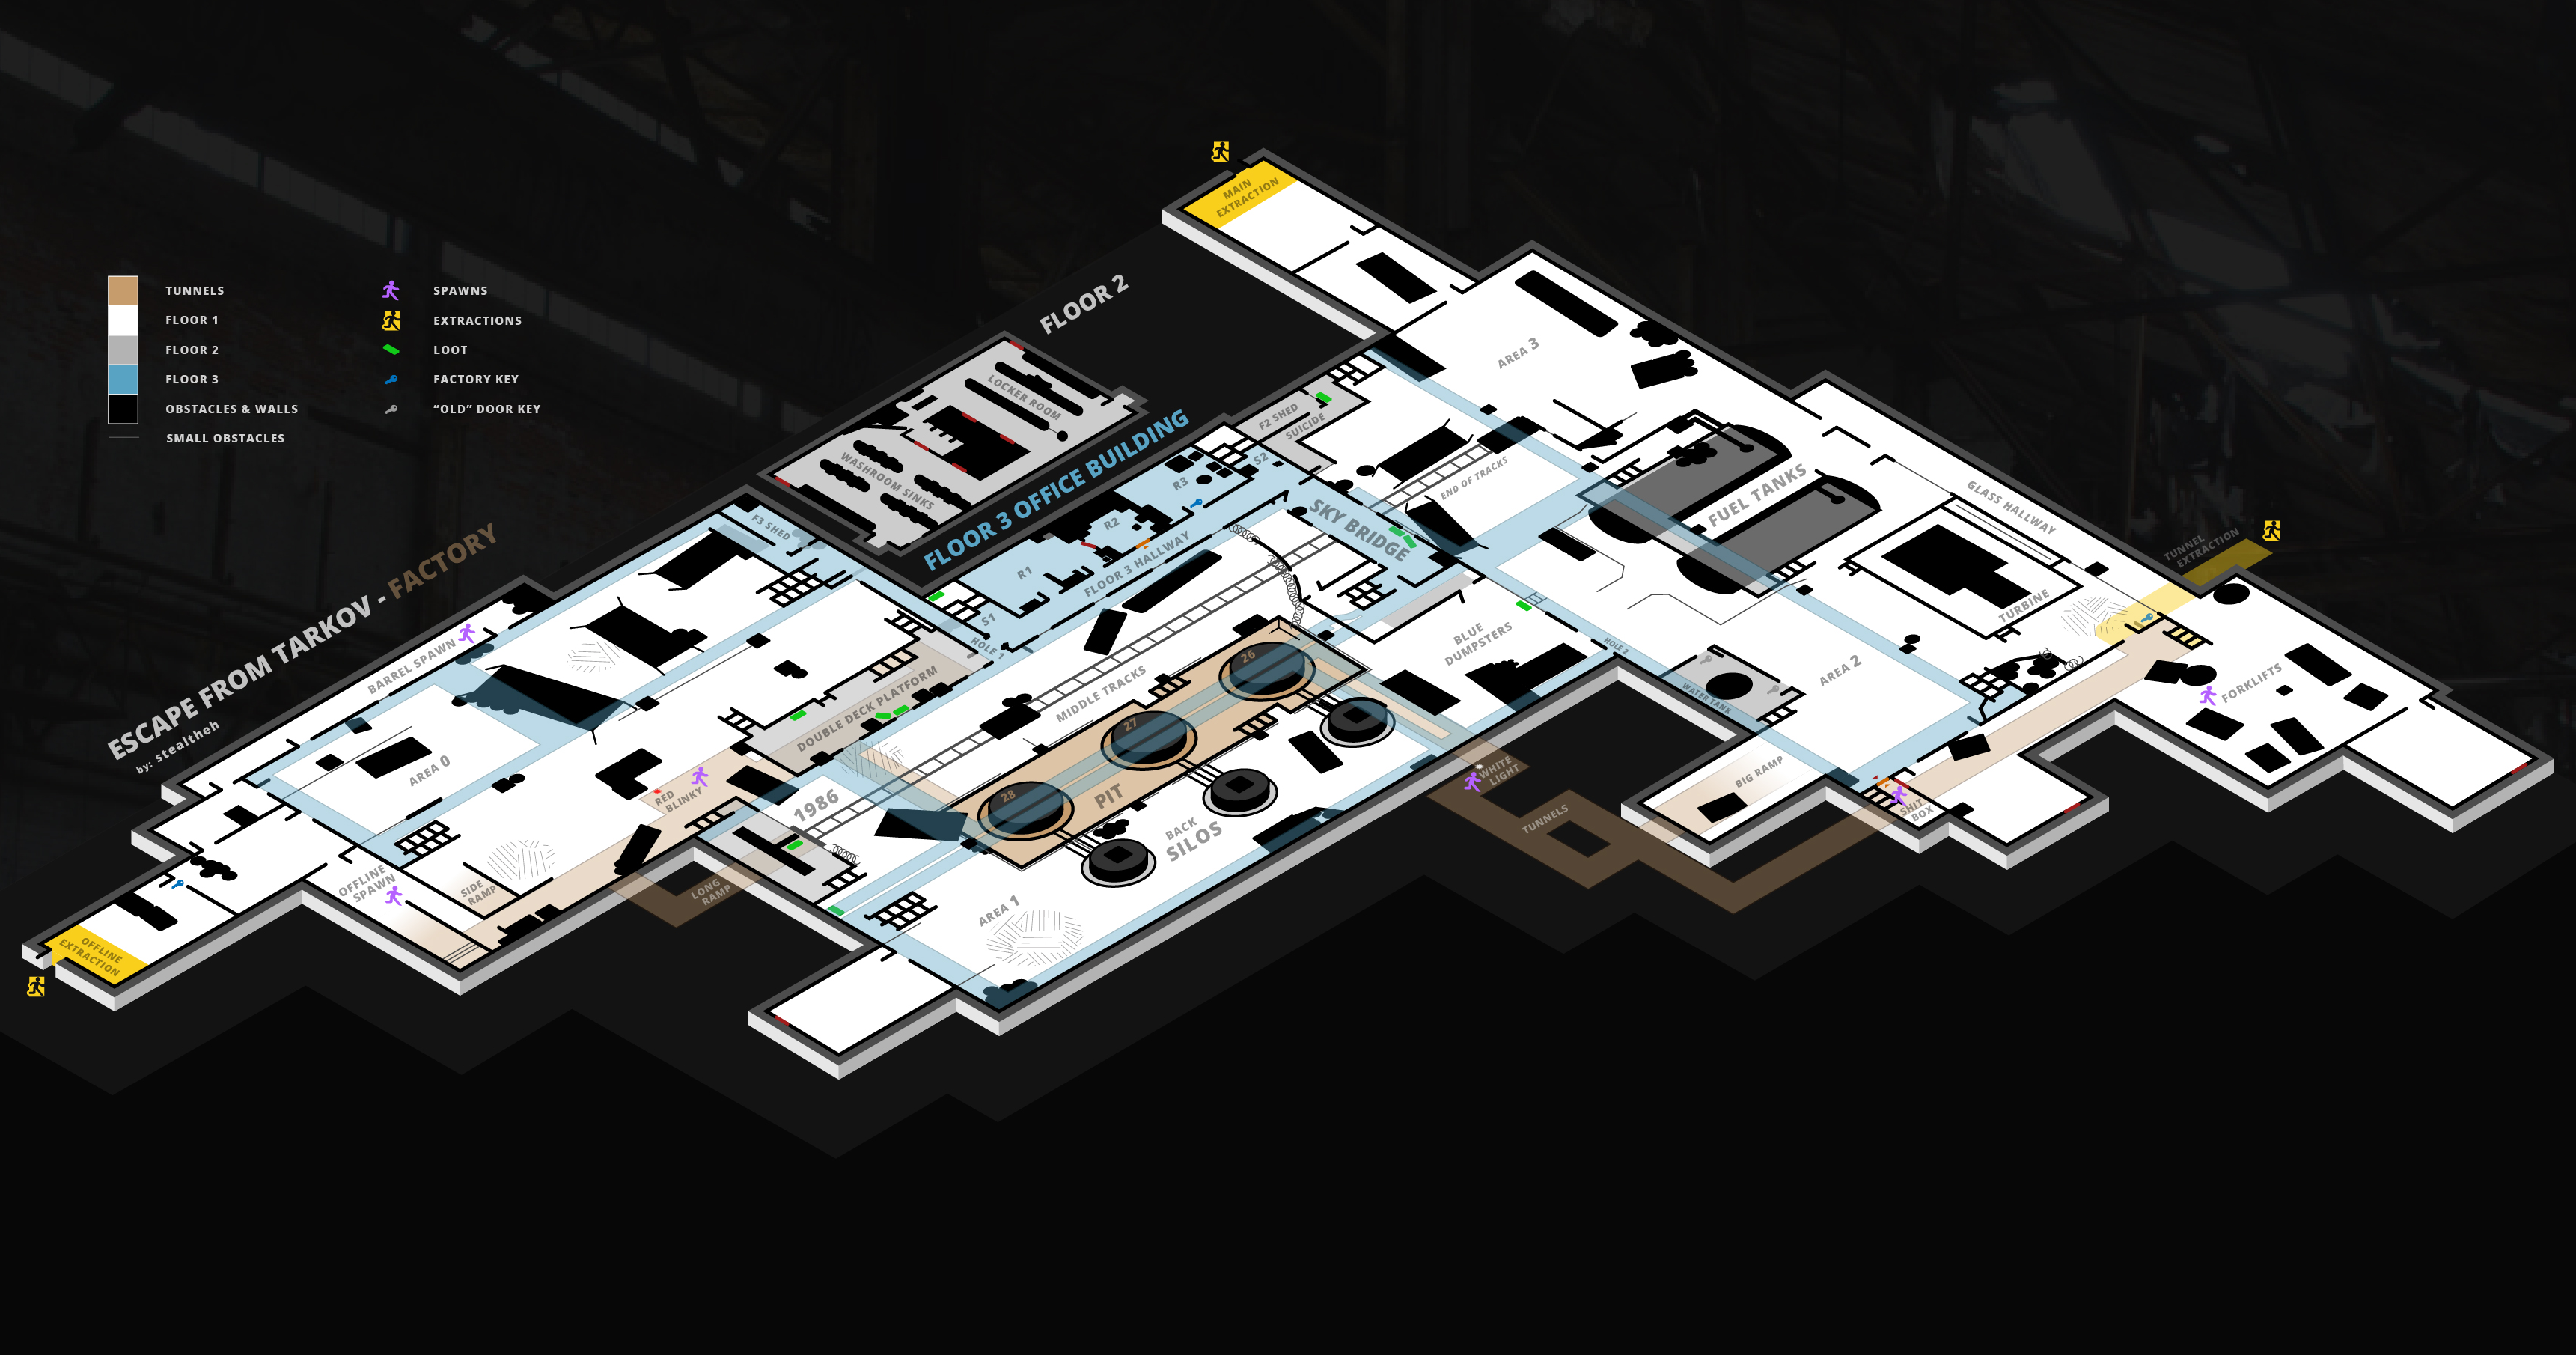
Quelle: http://forum.escapefromtarkov.com/profile/64271-stealtheh/
Interaktive Karten
Die detailliertesten Karten findet Ihr hier: http://eftmkg.com
Diese Karten könnt Ihr zoomen und sie zeigen Euch ganz detailliert auch die einzelne Loot- und Schlüssel-Positionen.