Auf dieser Seite zeige ich Euch ein paar Waffen-Moddings mit der genauen Angabe, welches Teil bei welchem Händler in welcher Stufe gekauft werden kann.
Webseite für Modding
Auf der URL https://www.eftdb.one/ könnt Ihr super effektiv Waffen modden, da Ihr dort gezeigt bekommt, welche Teile wo passen.
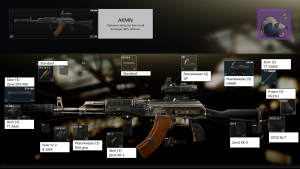
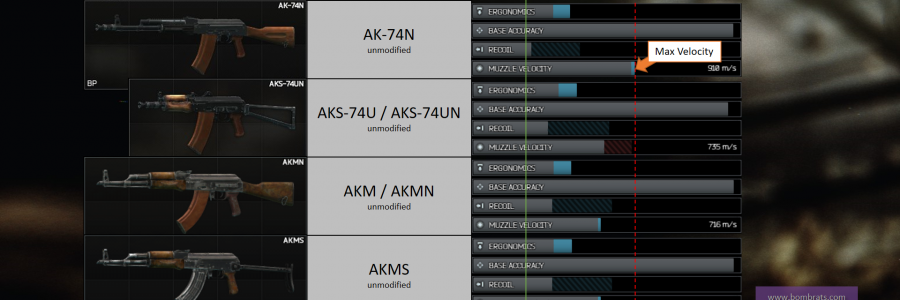
AKM / AKMN
Die AKM und AKMN sind die gleiche Waffe, nur kann die AKM kein Scope mit Vergrößerung nutzen sondern nur normale Visiere (Red Dots/RDS).
In Escape From Tarkov ist es extrem wichtig, die Trader hochzuleveln. Denn nur dann bekommst Du die Möglichkeit, bessere Waffen und vor allem Ausrüstung wie Scopes oder Schalldämpfer direkt zu kaufen.
Fragen zu dem Thema bitte im offiziellen Forum in diesem Topic stellen:
Wenn Du eine coole Community suchst, die super Anfänger-freundlich ist, dann bist Du auf unserem Discord richtig. Klick einfach auf den Discord-Button unten und spiel sofort mit!
Derzeit (Stand Januar 2018) gibt es 5 Händler in Escape From Tarkov.
Fence kann man derzeit nicht leveln (auch wenn die Angabe 1 Mio Umsatz dort steht)
Peacemaker levelt hoch, sobald Ihr genug Umsatz (Kauf und Verkauf zählen zusammen) generiert habt und entsprechende XP-Level erreicht habt.
Prapor, Skier und Therapist verlangen für höhere Level sowohl Umsätze, bestimmte XP Level von Euch und zusätzlich noch eine bestimmte Reputation je Level. Diese erhöht Ihr bei diesen Händlern nur, indem Ihr ihre Missionen erfüllt.
Welchen Trader soll man zuerst verbessern?
Das kommt darauf an, was Dir wichtiger ist. Unten seht Ihr detailliert, wer was bei welchem Level anbietet und eine Zusammenfassung, welche Vorteile jeder Trader hat.
Hier nun die Auflistung, welche Waffen und Gegenstände der jeweilige Händler (EFT Trader) durch das Hochleveln bereit stellt:
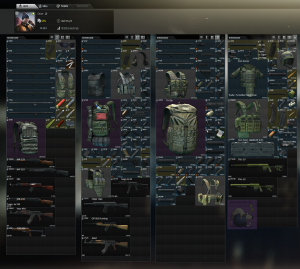
Skier
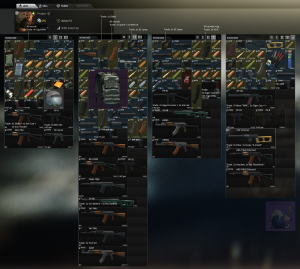
Vorteil: bei Level 2 bekommt man die Hunting-SKS, die ein 4x Scope nutzen kann, das es bei Prapor schon bei Level 2 gibt. Ab Level 2 (Skier) bekommt man die schwarze Rüstung (PACPA), größeren Rucksack (SCAV) und das Headset. Schon bei Level 3 gibt’s den Tri-Zip Rucksack und versch. Schalldämpfer.
Alle Items von Skier. Zum Vergrößern anklicken.
Peacekeeper
Die Umsatzziele wirken irrsinnig hoch, aber Ihr könnt einfach ein paar Rubel umtauschen und davon ein paar Sachen kaufen (MP5, M4A1 oder Scopes und Führungschienen (Rails und Shrouds), dann habt Ihr den Umsatz schnell zusammen.
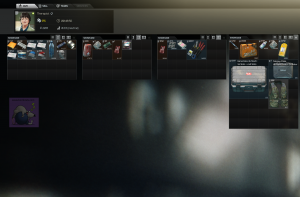
Peacekeeper ist einfach zu leveln, da er keine Missionen verlangt sondern einfach nur Umsatz. Wenn Du Dich auf ihn konzentrierst, also einfach alles bei ihm verkaufen und so weit es geht nur bei ihm Waffen und Ausrüstung kaufen. Vorteil: geht schnell nach oben und bei ihm bekommst Du die M4A1 sowie Scopes bei Level 3. Nachteil: relativ teuer.
Alle Items von Peacekeeper. Zum Vergrößern anklicken.
Fence
Kann derzeit nicht gelevelt werden: dieser Händler bietet fast nur die Sachen an, die andere Spieler ihm verkaufen, daher sind viele Dinge schneller weg, als man klicken kann, es gibt aber, trotz anderer Angabe oben rechts, keine Möglichkeit, mehr Items freizuschalten.
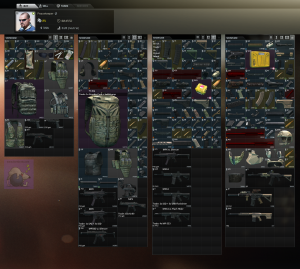
Prapor
Schon bei Level 2 die AK74N (sogar zum Eintauschen gegen 2 Werkzeugtaschen), die AKM, den Schalldämpfer für die AKM/AKMN, ab Level 3 die restlichen Schalldämpfer außer für die M4A1.
Alle Gegenstände und Tauschobjekte für EFT Händler Prapor. Zum Vergrößern anklicken.
Therapist
Wenn Du Level 3 bei Therapist erreicht hast, kannst Du die mistigen Saliva-Packs kaufen. Du brauchst sie dann selbst nciht mehr, kannst sie aber netterweise neuen Spielern schenken, die damit die erste Mission viel schneller abschließen können.
Vorteil: ab Level 2 gibt’s das Car Medi Kit (man braucht ab da keine Bandagen mehr), ab Level 3 kann man die Salewa Kits kaufen. Wichtig: ab Level 3 kann man die Werkzeugtasche billig kaufen udn damit bei Prapor billig eine AK74N bekommen.
Alle Items von Therapist. Zum Vergrößern anklicken.
Wenn Du eine coole Community suchst, die super Anfänger-freundlich ist, dann bist Du auf unserem Discord richtig. Klick einfach auf den Discord-Button unten und spiel sofort mit!
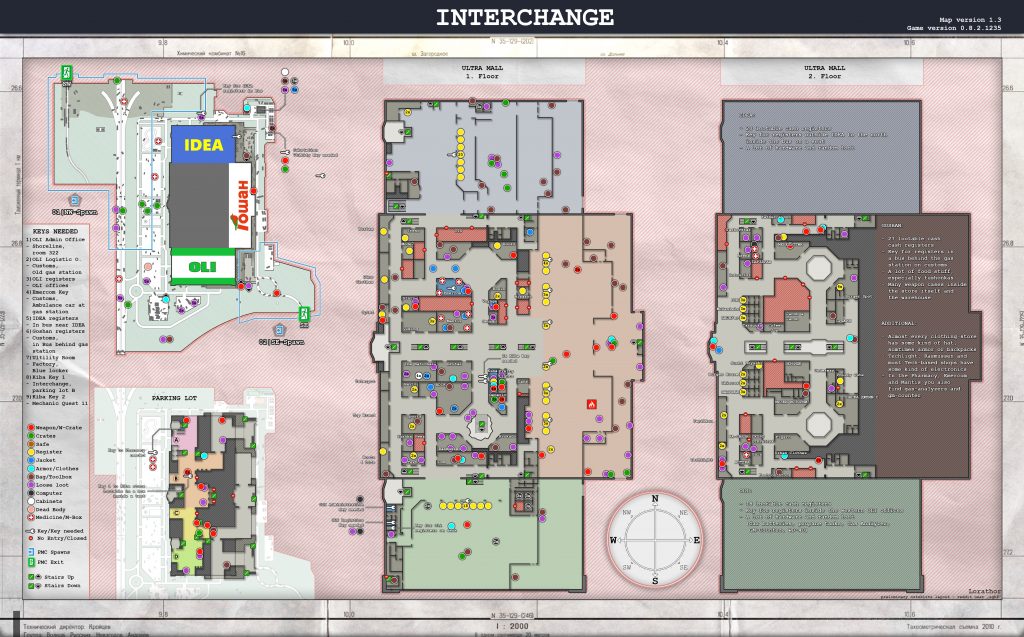
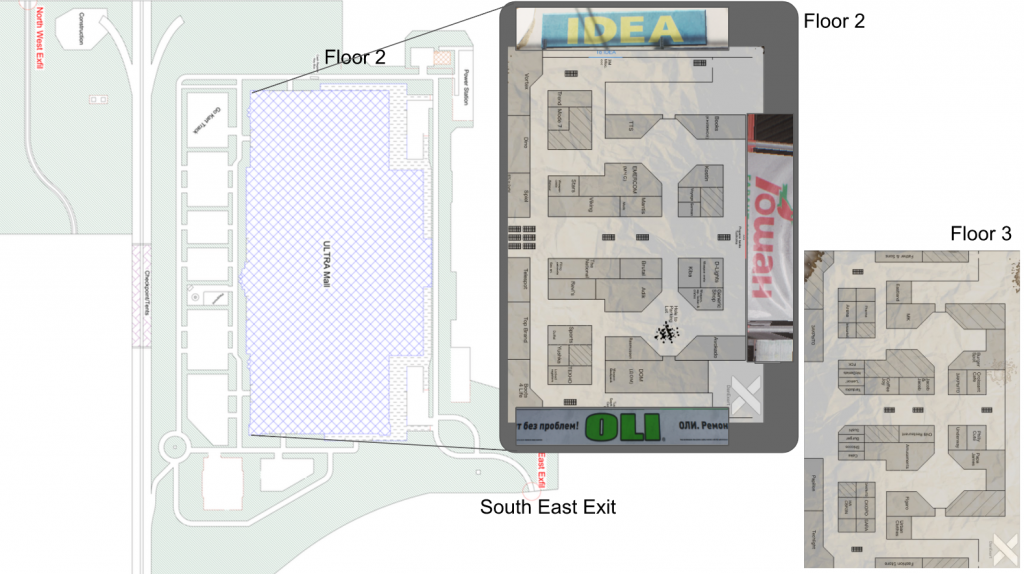
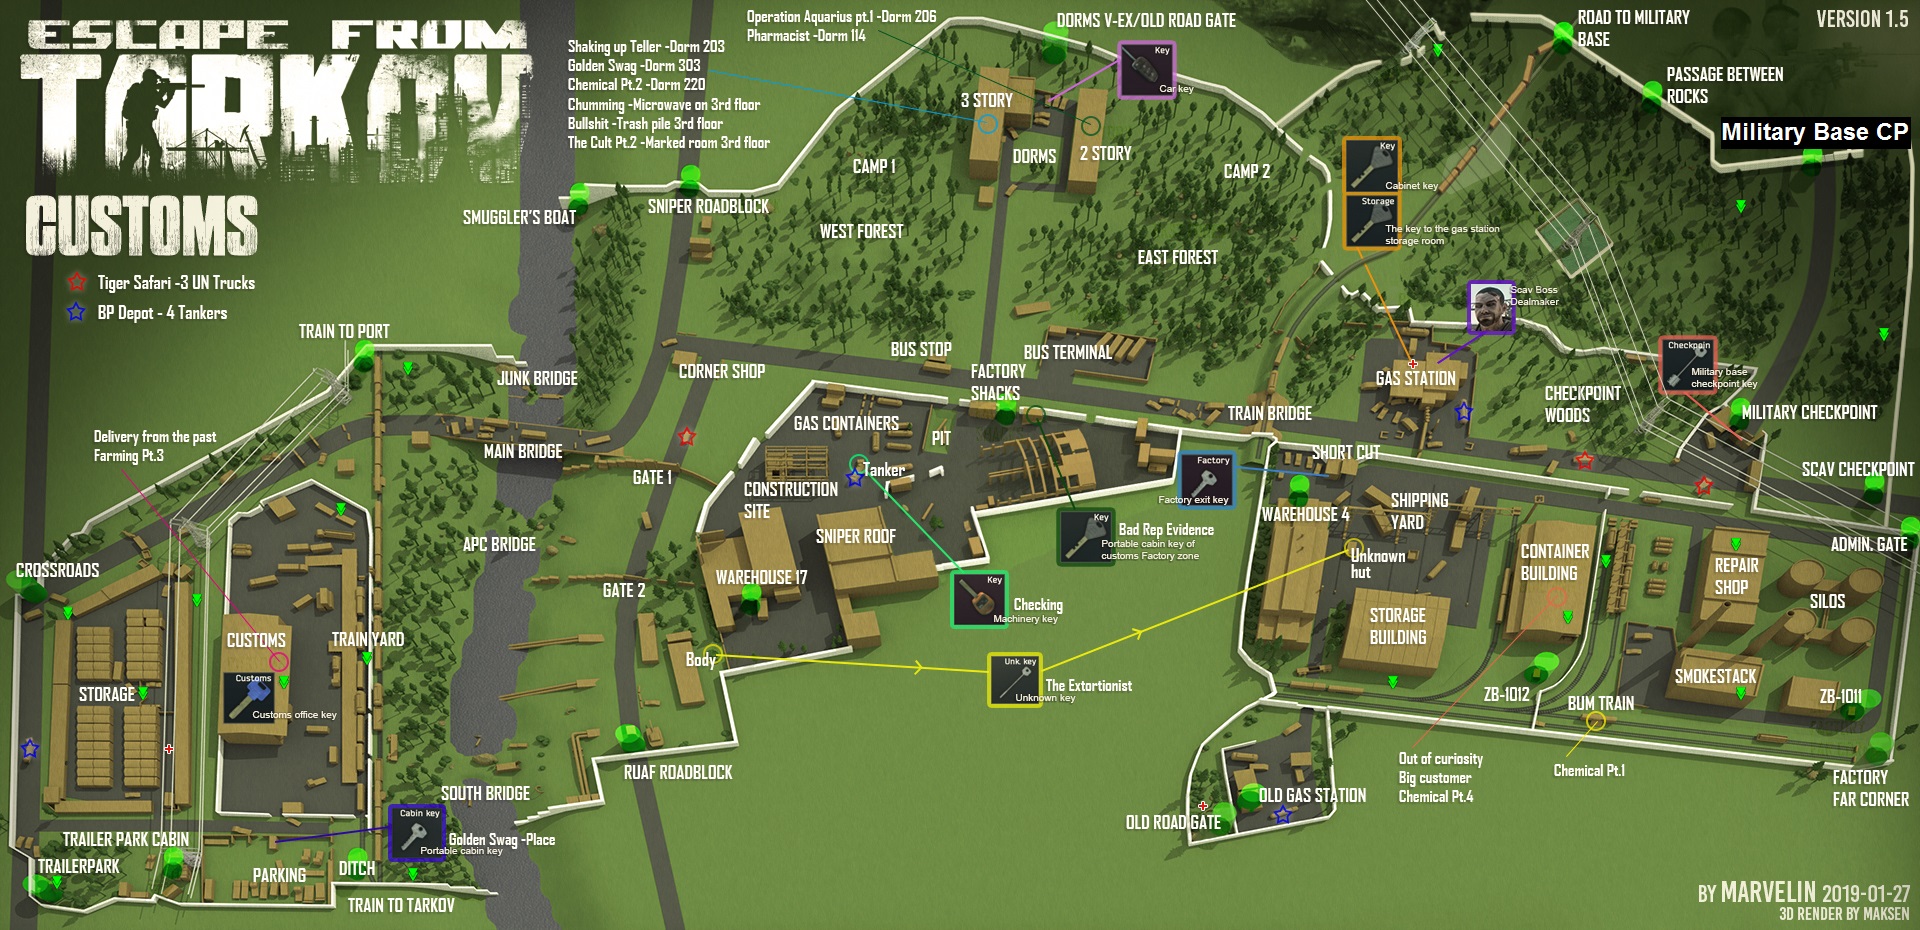
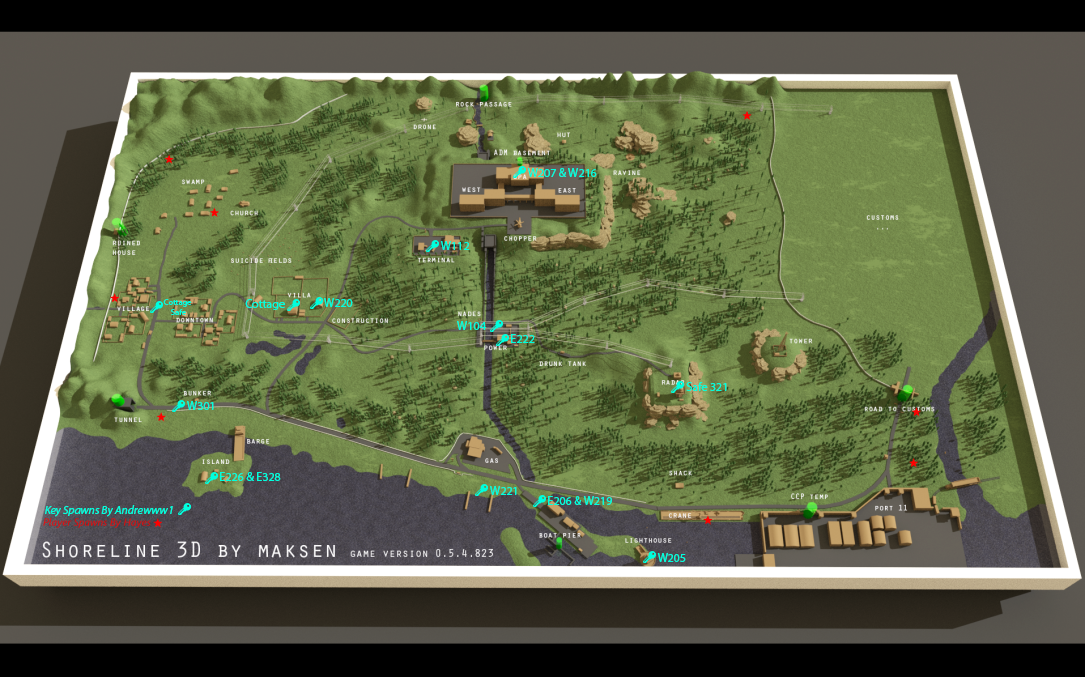
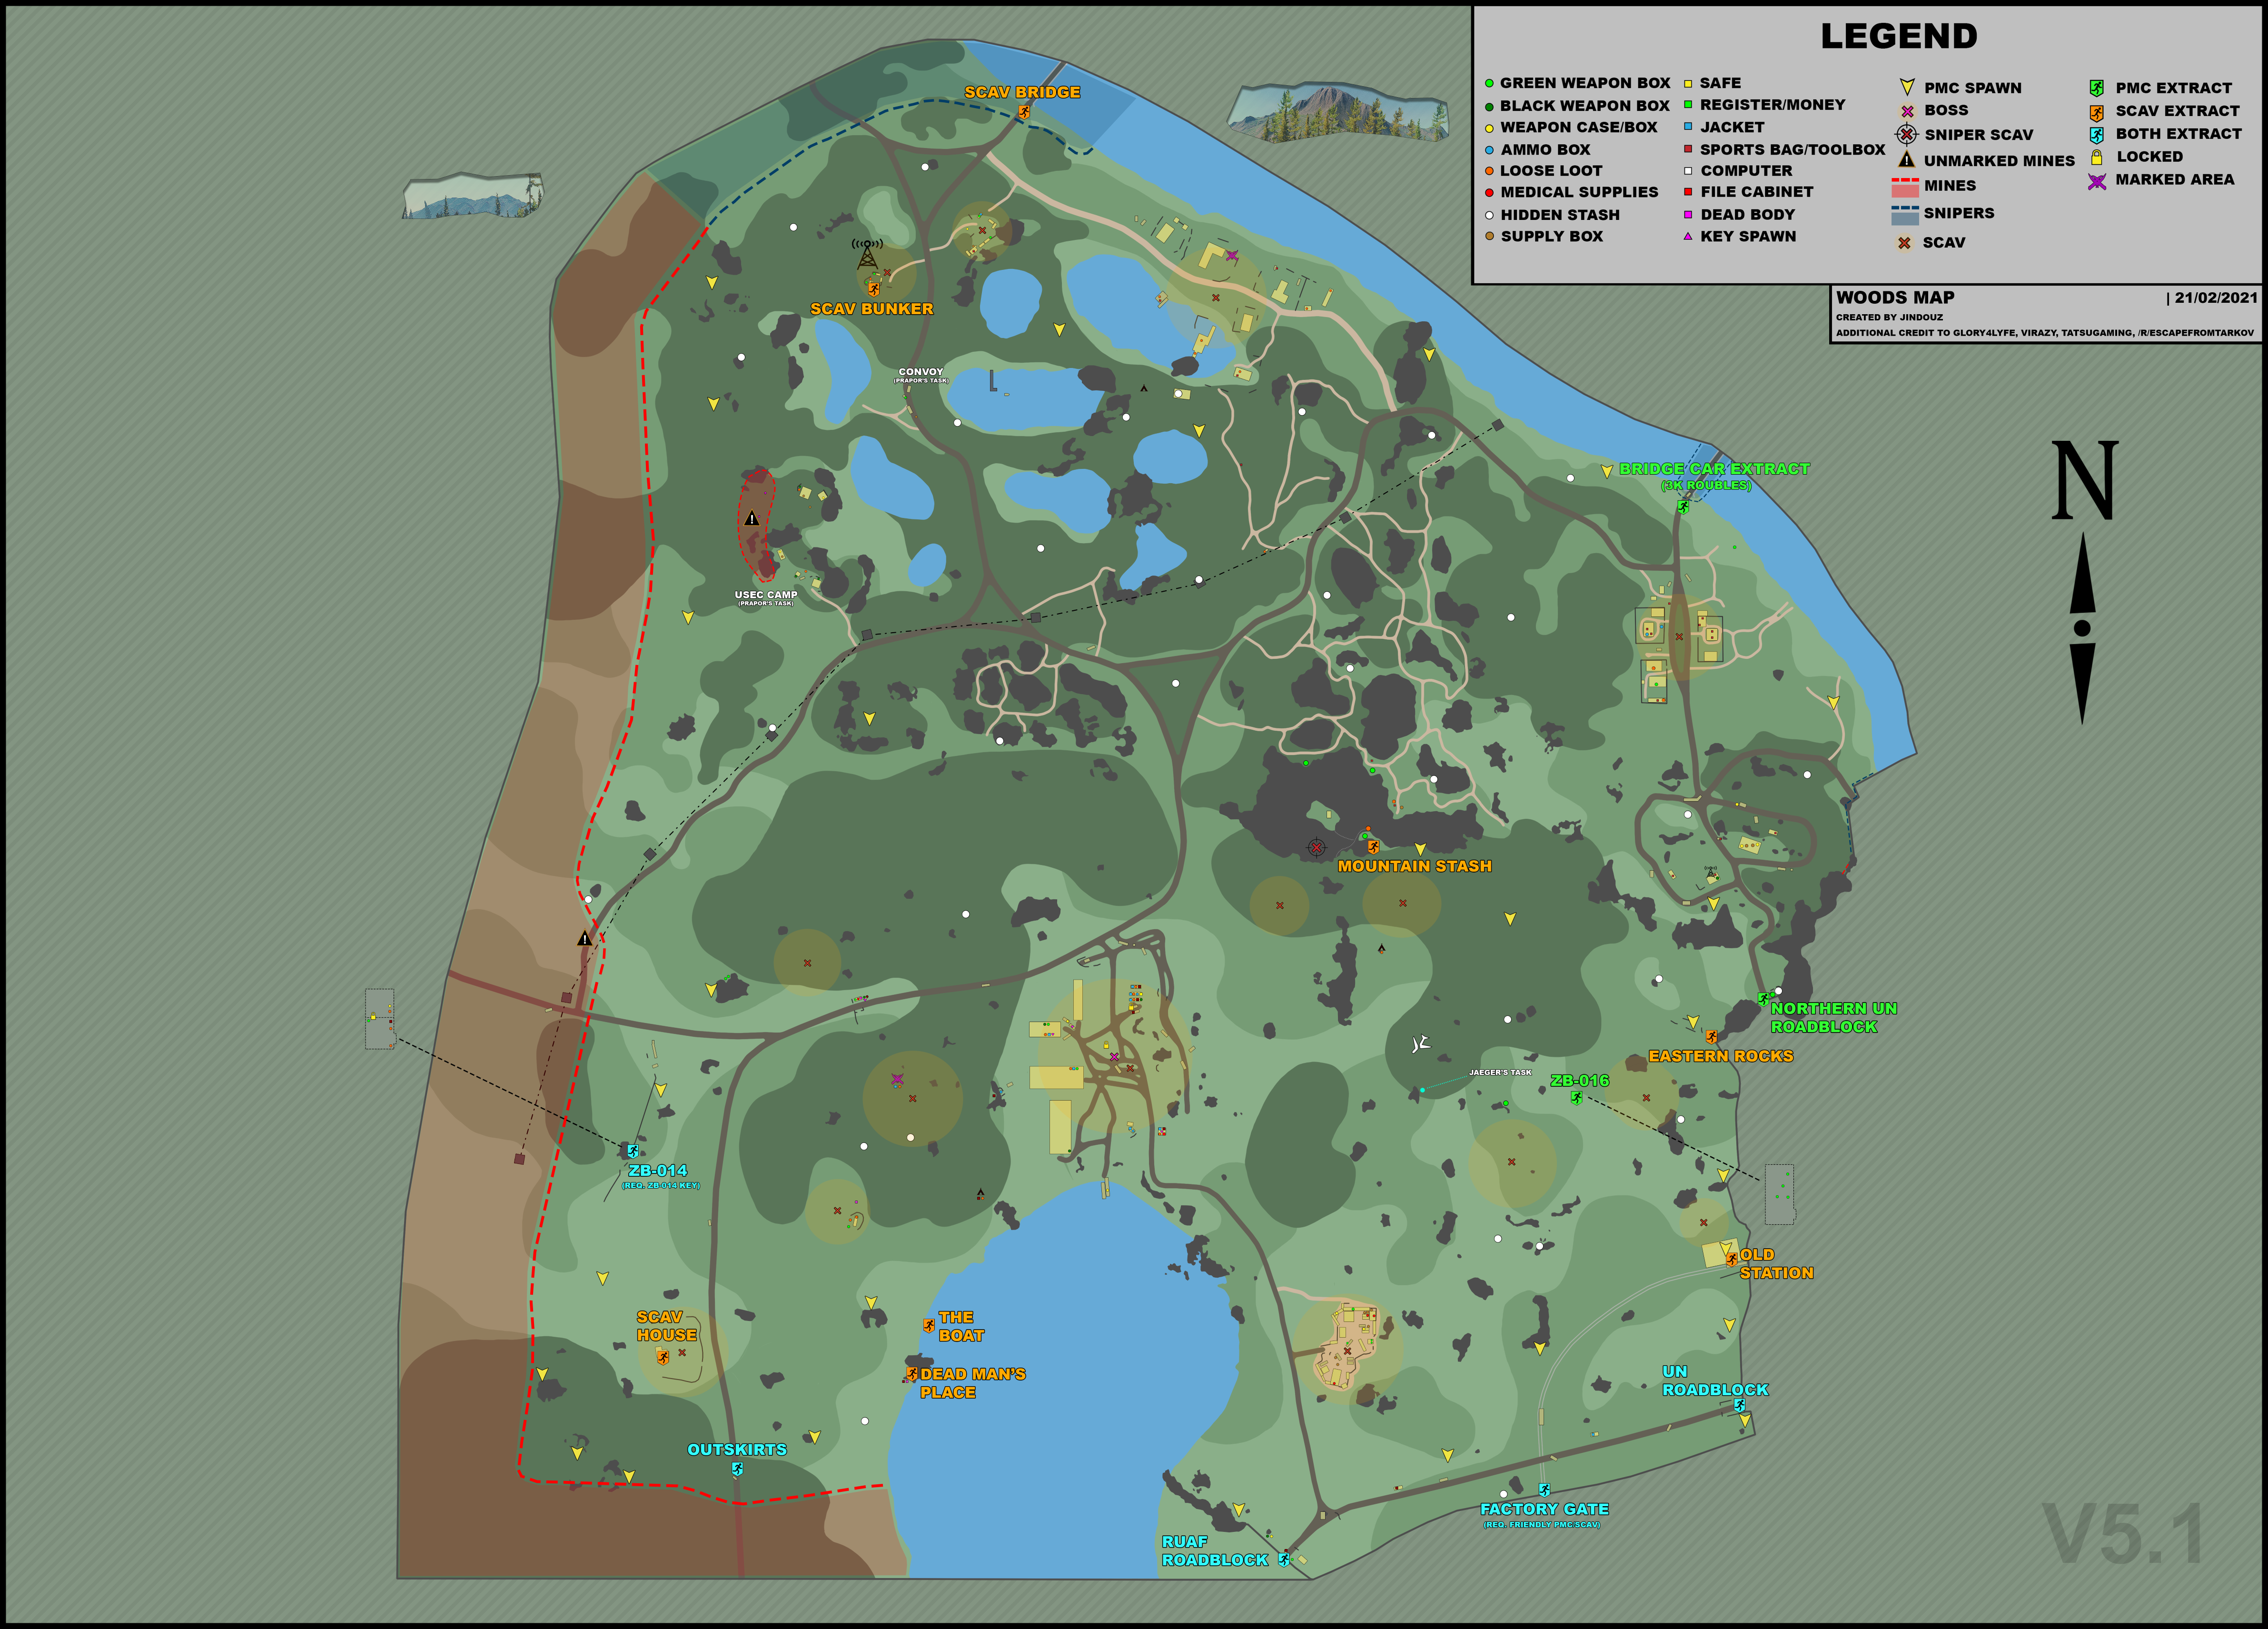
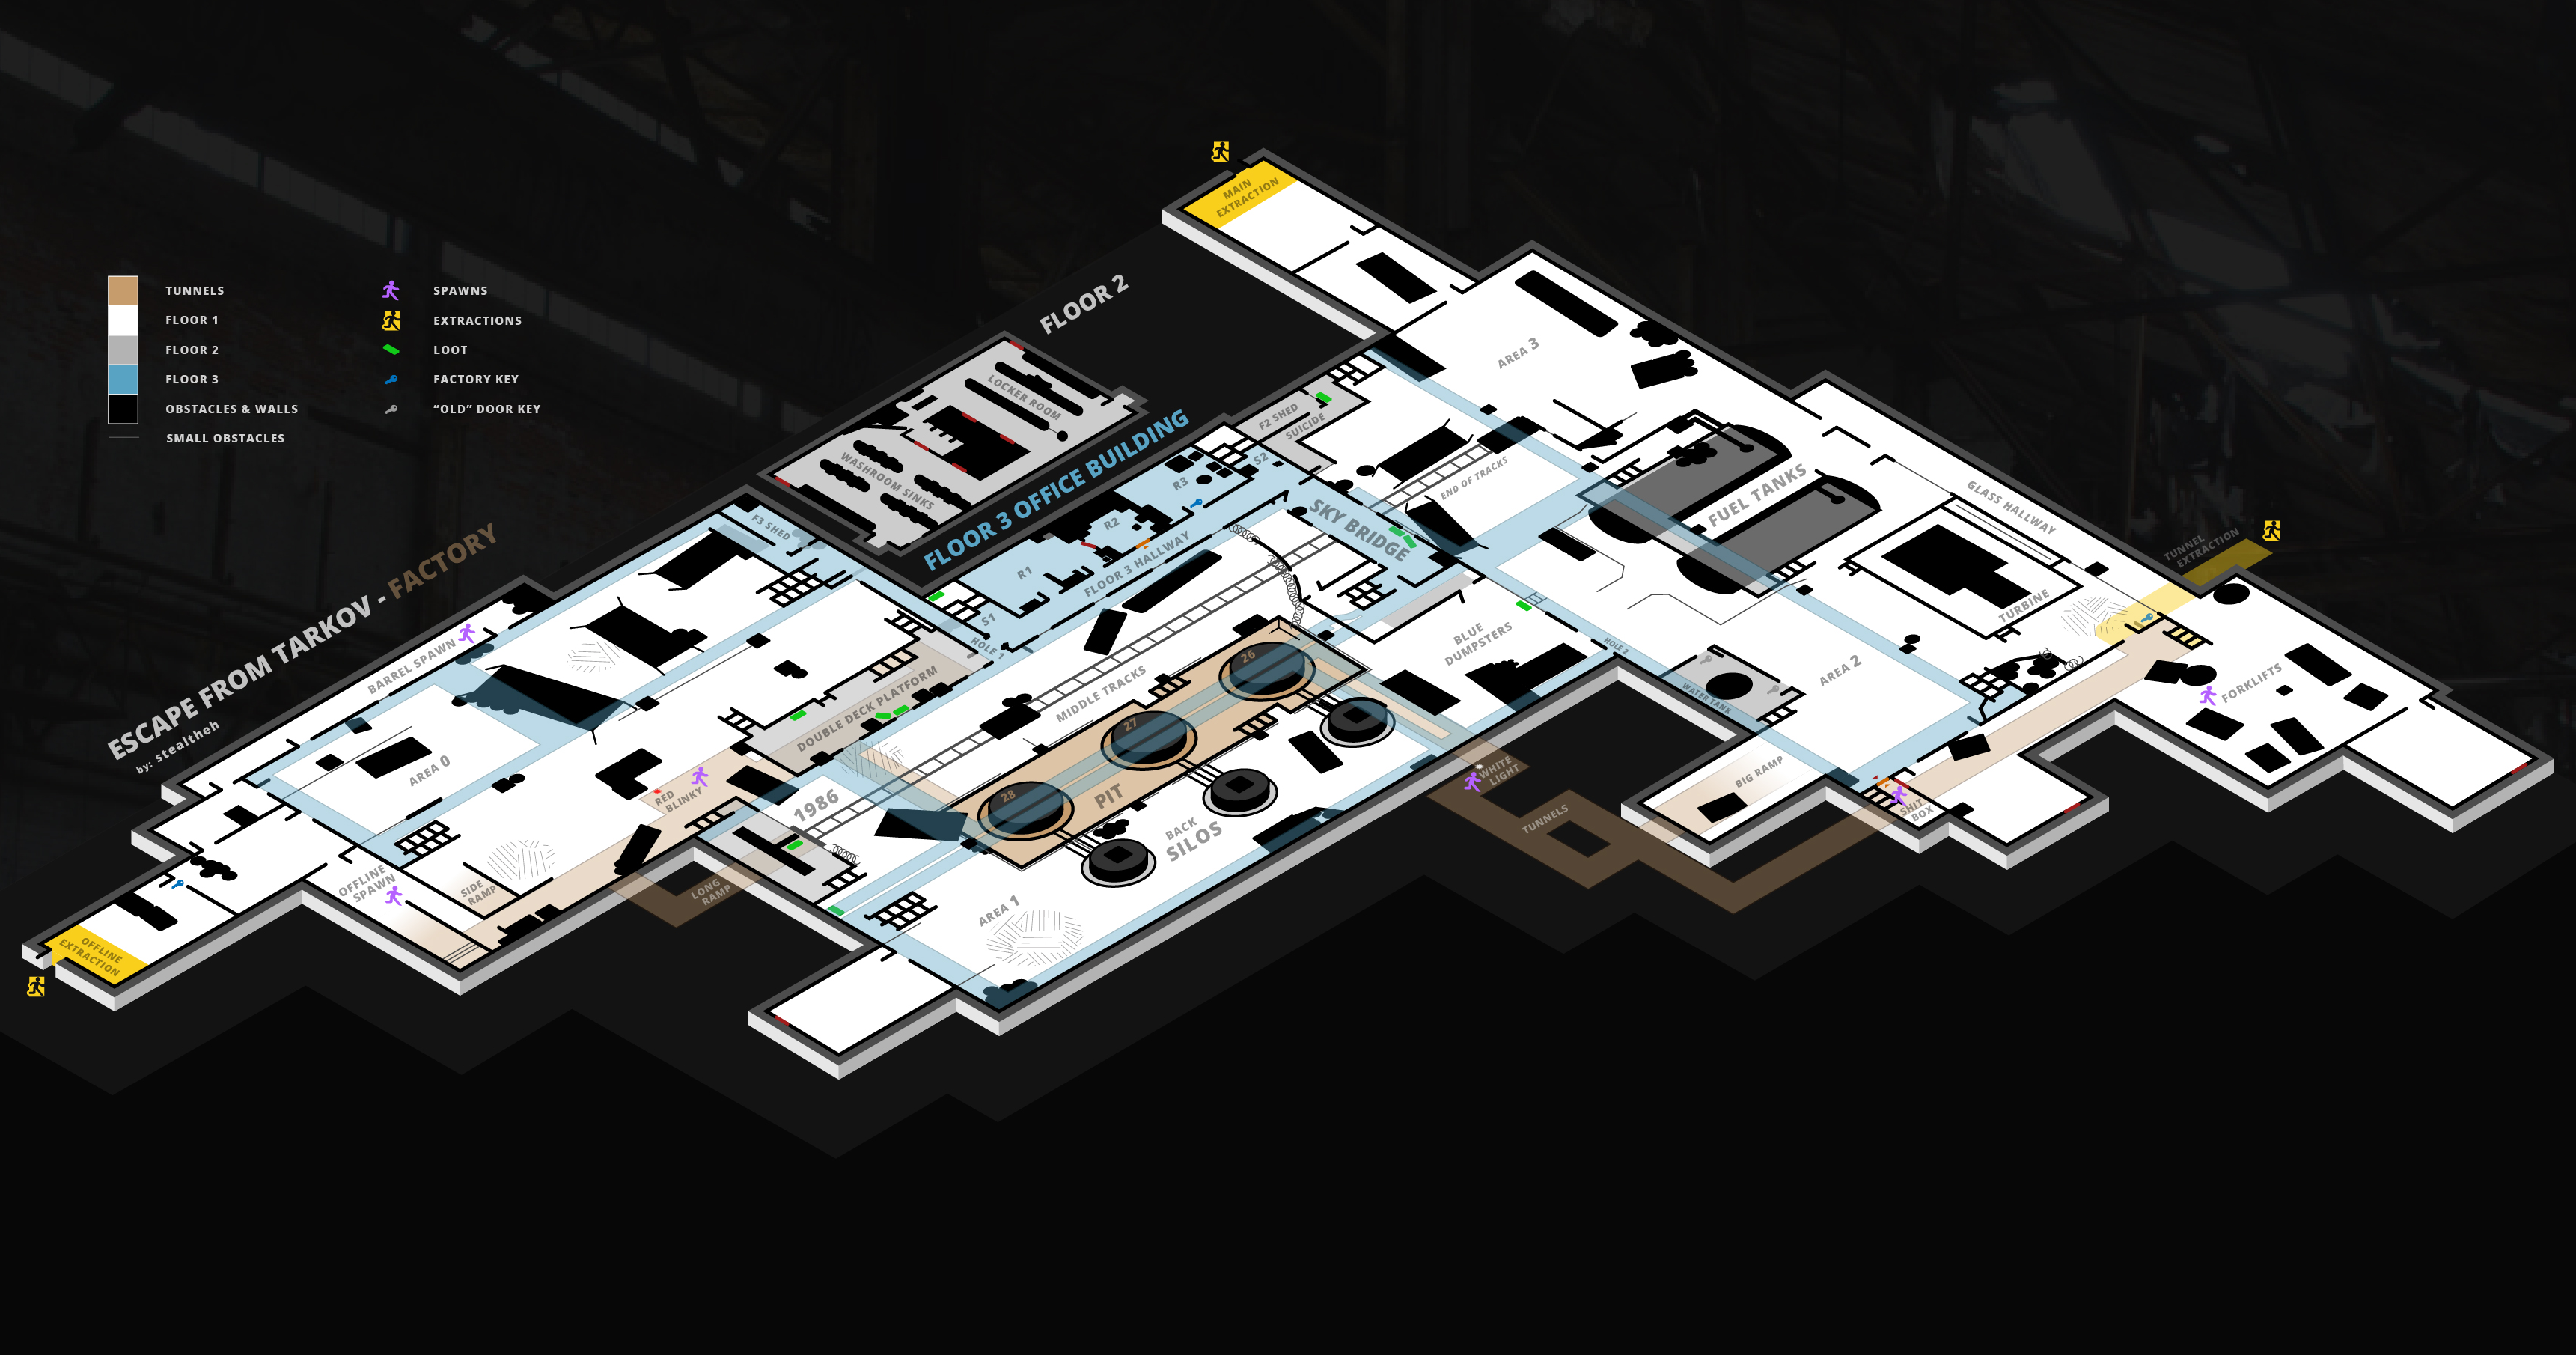
In jeder Karte müsst Ihr den Ausgang finden, ohne Karte ist das… etwas schwierig. Hier daher die besten Karten. Je nachdem wo Ihr spawnt und abhängig davon, ob Ihr PMC oder SCAV seid, liegen Eure Exits an anderer Stelle, außerdem sind einige Exits nur zu bestimmten Zeiten offen. Mehr bei den jeweiligen Karten.
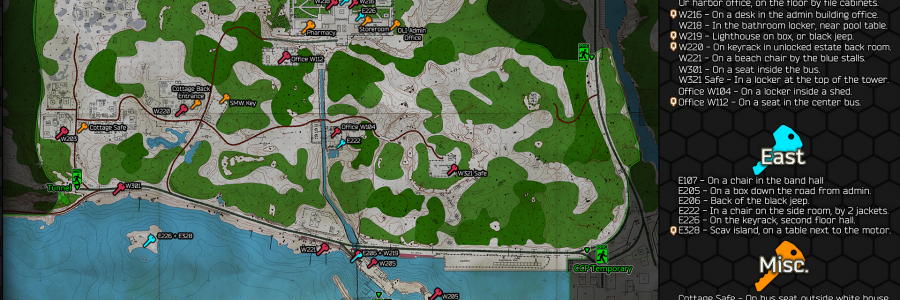
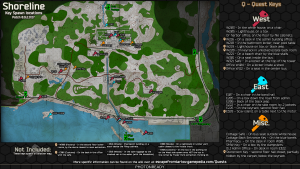
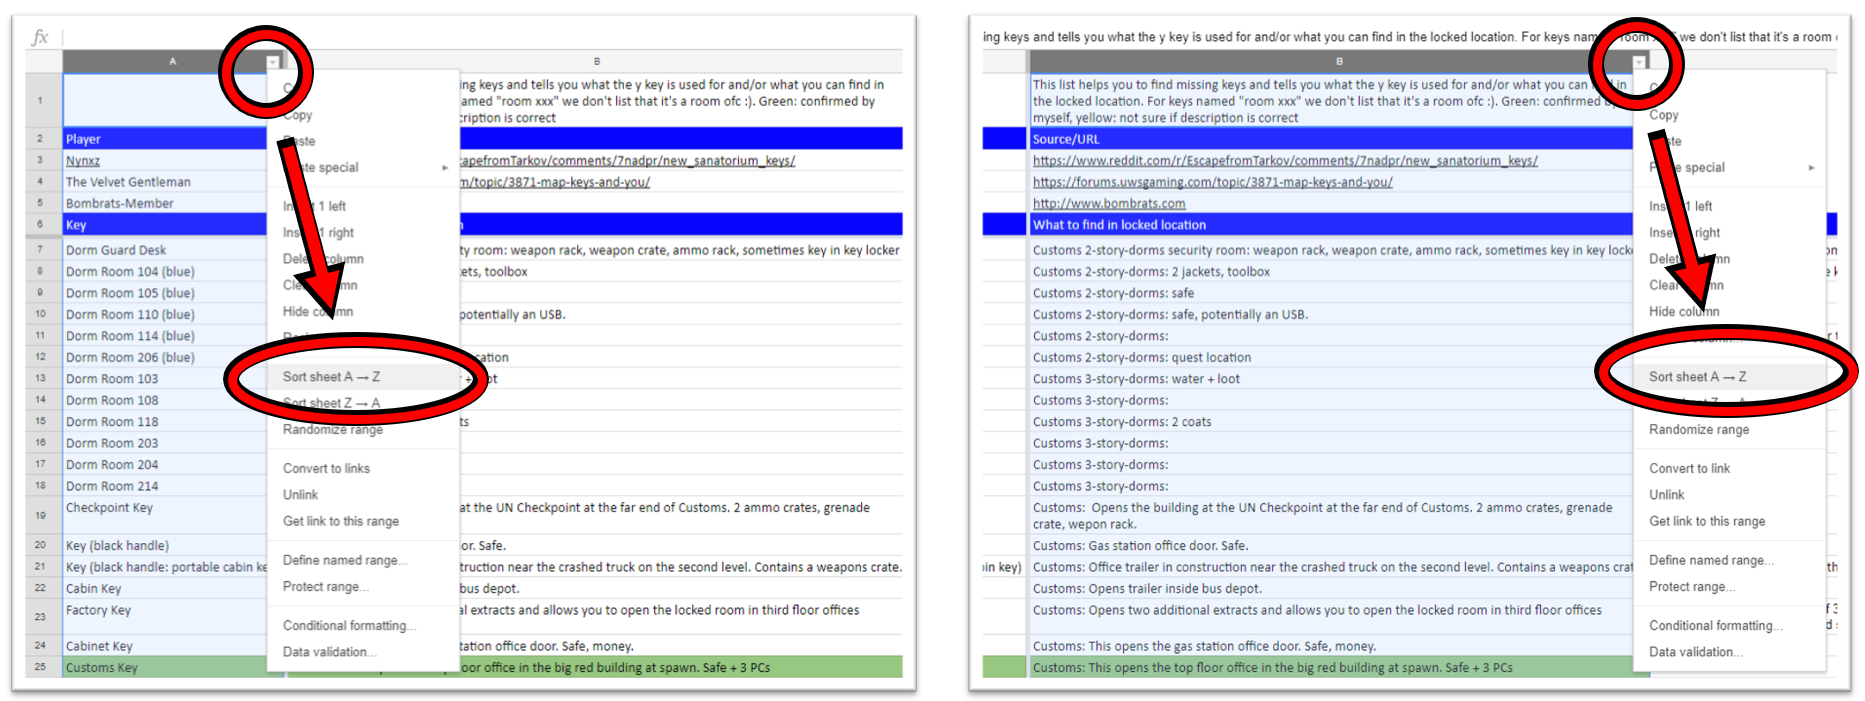
Hier findet Ihr eine Liste aller Schlüssel im Game. Ihr könnt die Liste sortieren, entweder nach der Location, wo der Schlüssel gebraucht wird (Customs, Shoreline etc) oder nach dem Fundort (Map und genaue Location).
Außerdem enthält die Liste eine Beschreibung, was in dem Bereich zu finden ist, wofür der Schlüssel gebraucht wird.
Wer entweder Weihnachten 2018 das Spiel besaß oder es zum Special Deal Weihnachten 2017 gekauft hat, bekommt kostenlose Anleitung, wie Ihr die Items bekommt und was enthalten ist.